Bookmark Favor
From Giftypedia
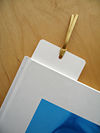
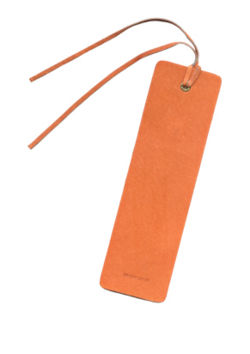
Say "Thank You" to your guests for celebrating your “big day with a memento of a DIY personalized bookmark wedding favor. You can also use this favor idea to make bookmarks to send your guests as save the date cards with a cute saying like “Don't Forget to Bookmark the Date”. Homemade wedding favor bookmarks can be designed to suit your own personal taste and can be coordinated with your wedding's theme.
Supplies Needed
- High quality color printer
- Make sure to purchase extra printer ink.
- Cardstock (white, cream, or pastel colors work the best)
- Paper Trimmer
- Scissors
- Ribbon a color that coordinates with your wedding colors.
- Hole puncher
Optional Supplies
- Digital Photos
- Laminating Machine and Supplies or Self-Adhesive Laminating Sheets
- Most copy service businesses, such as FedEx Office offer laminating services. Also they offer printing services if you do not want to print your bookmarks on your home printer, just take a copy of your file and they should be able to help you.
Directions
- Using your computer's program for word processing, or picture editing (i.e. Microsoft Word or Publisher), design the layout of your bookmark.
- Some programs may already have a bookmark format set-up or you can find downloadable bookmark templates online and at Microsoft Office Online. Otherwise, it is rather simple to create a template bookmark with your computer program by creating a table with some columns. Your bookmark favor can be personalised with quotes or poems, scripture, fun facts about the bride and groom, names and wedding date, and even pictures.
- Print a test page to make sure the bookmark is formatted the way you want, be sure to check for any grammar errors. When you are content with the look of your bookmark template, it is time to print them out on the cardstock. Be sure to save the file if you plan to print more bookmarks in the future.
- If you are not going to laminate your bookmarks just skip this step. Laminate your bookmark using a laminating machine or laminating sheets, trim the laminate to about 1/4" all the way around. This will prevent the laminate from separating around the bookmark.
- Punch a hole on top with a single-hole puncher.
- Then cut the ribbon to your desired length, be sure to cut it at a diagonal or with pattern-edged scissors for an added decorative accent.
- Then thread the ribbon through the hole and put a knot in it. Be sure that there is enough ribbon hanging so that when the bookmark is placed within a book that the ribbon will hang outside the book an inch or two.
More DIY Wedding Favors...
Keepsake Wedding Favors...
|
Edible Wedding Favors...
Bath/Eco-Friendly Wedding Favors...
Related Articles



 Printer Friendly
